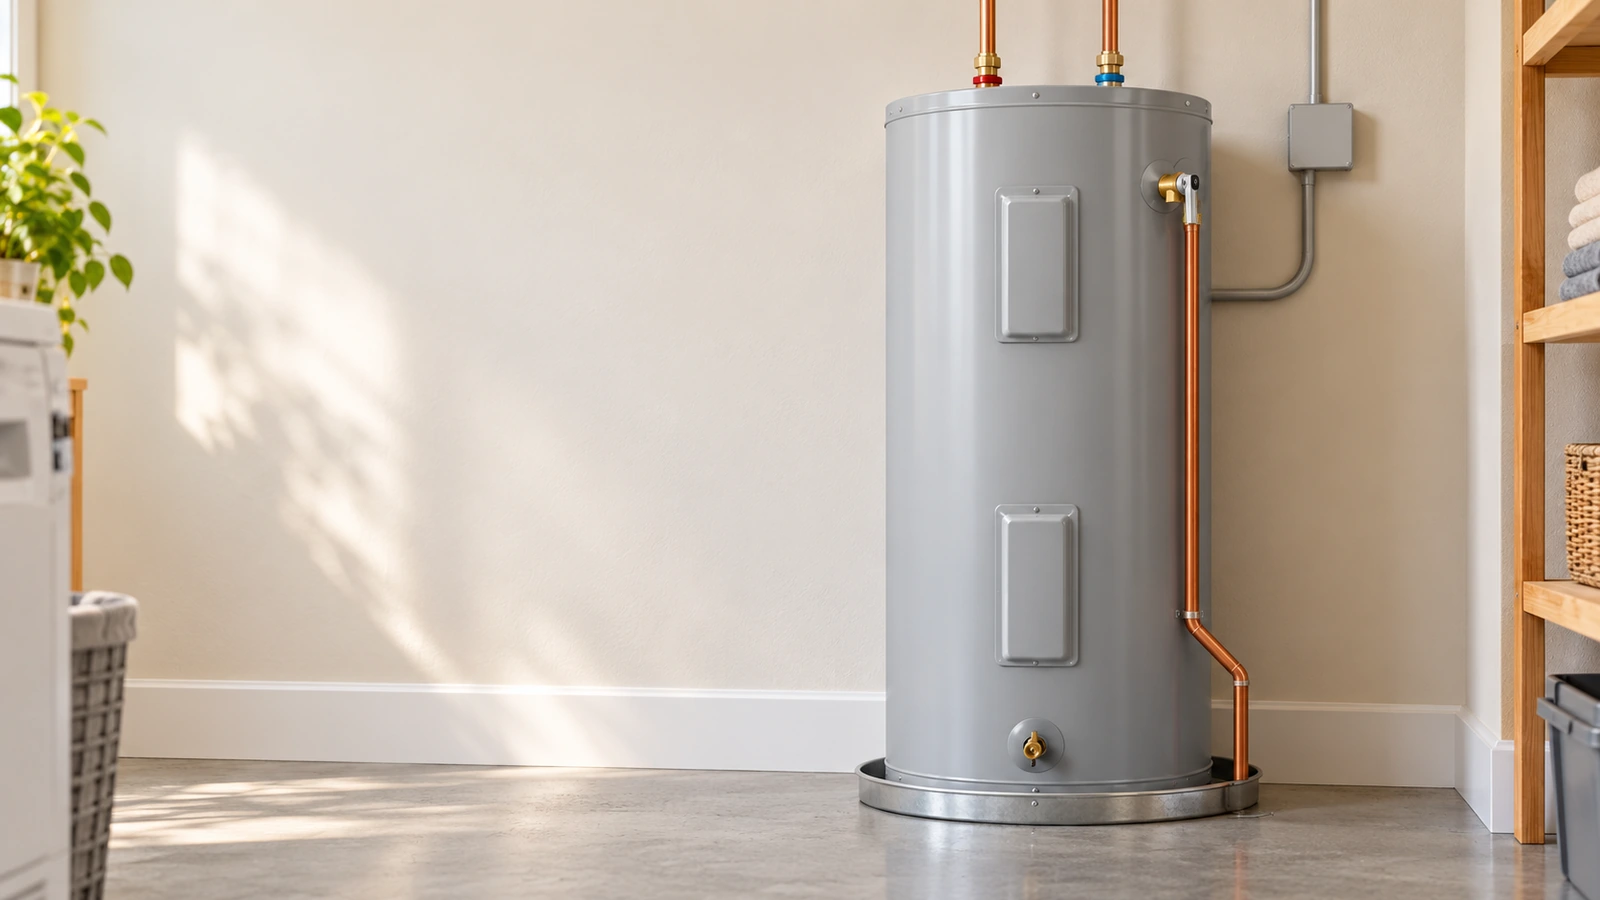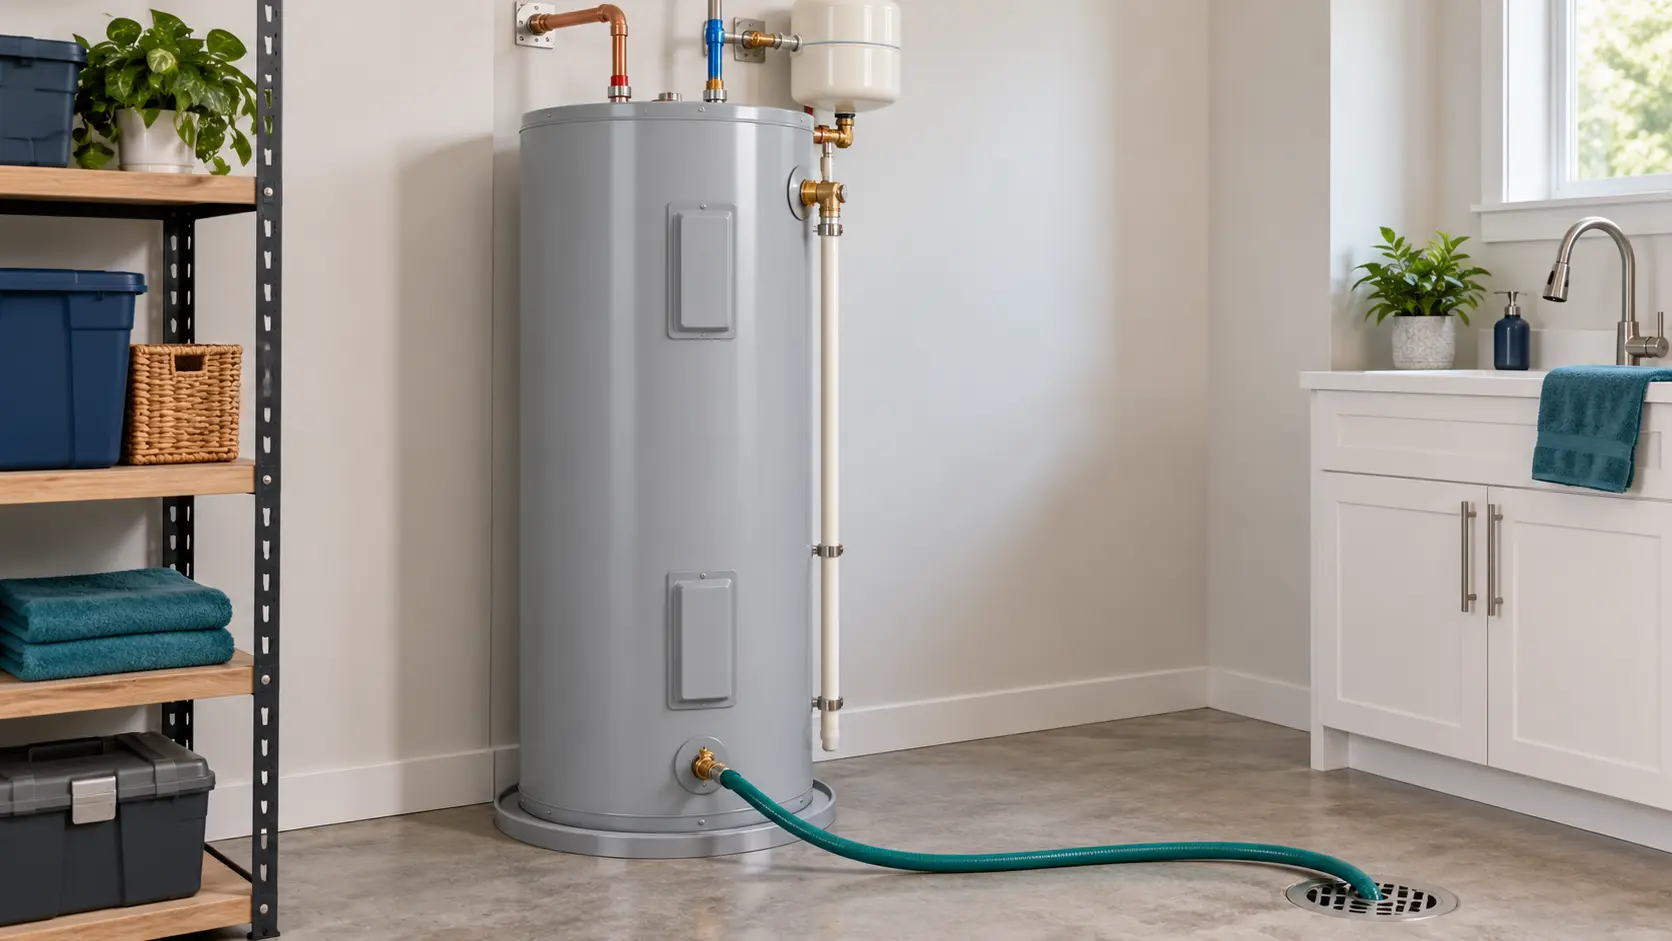
To flush a water heater, you typically turn off its heat source, allow the water to cool, connect a hose to the tank's drain valve, drain water as directed by the manual, and use fresh water to wash sediment out. The most important step comes at the end: refill and purge the tank before turning the heat back on.
This guide covers residential storage-tank water heaters, including common gas and electric models. It explains what to check before starting, why the cold-water inlet may be closed for draining but opened for flushing, and what to do if the valve or water flow gives you trouble. Tankless water heaters use a different descaling procedure.
Important: follow your model's instructions first
Water heater controls, shutdown requirements, drain valves, and service procedures vary. Locate the make and model on the unit's label and use its owner's manual. Do not flush a damaged or actively leaking heater, open electrical compartments, work on gas piping, or force a stuck valve. If any step is uncertain, have a qualified plumber or service technician handle the work.
Before You Start: Is Your Water Heater Safe to Flush?
Flushing removes some loose mineral sediment that settles at the bottom of a storage tank. It is maintenance, not a fix for a leaking tank, corroded fittings, a faulty thermostat, a failed heating element, or a gas control problem. You should be able to identify the unit, shut it down correctly, reach the drain valve, and direct potentially hot water to a safe drain without flooding the room.
Check which type of water heater you have
| Type | What changes before flushing? |
|---|---|
| Electric storage tank | Turn off the correct breaker or disconnect before draining. The heating elements must never operate with an empty or partially filled tank. |
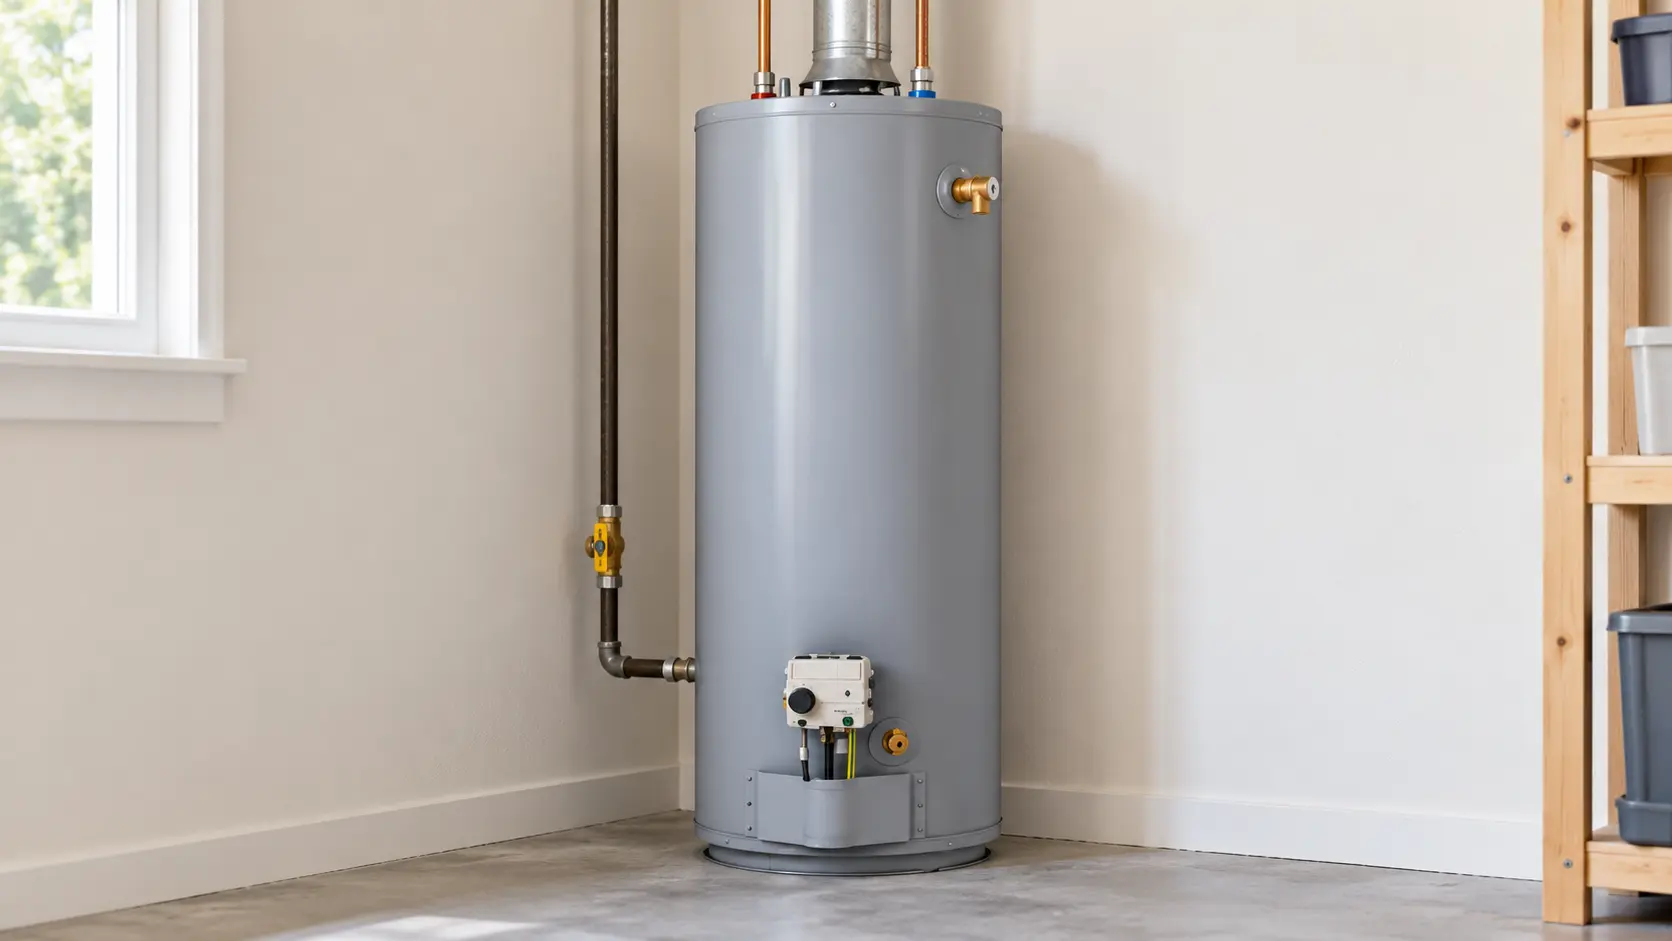
| Gas storage tank | Follow that model's shutdown instructions for the gas control and any manual gas shutoff specified in its guide. Do not improvise pilot-light or ignition steps. |
| Power-vented gas tank | Some units require shutting down both gas and electrical power. Check the model manual before proceeding. |
| Hybrid / heat-pump storage tank | Shut off electrical power as directed. Do not confuse the appliance's electronic modes or air filter service with tank flushing. |
| Tankless | Do not use this tank-draining sequence. See the tankless section below. |
These distinctions reflect manufacturer guidance, including A. O. Smith's draining/flushing overview and a Bradford White hybrid water heater manual. The table is not a substitute for your particular model's instructions.
Do not start if...
- The heater or its connections are actively leaking, badly corroded, damaged, or unstable.
- The drain valve is stuck, dripping, or visibly deteriorated.
- You cannot confirm the correct electrical/gas shutdown procedure.
- You have no secure, heat-tolerant route for draining water.
- You are unsure how to refill and verify the tank is full.
Protect against hot water and flooding
- Water inside a heater can be hot enough to cause serious burns.
- Plan the hose route before opening anything; keep children and pets away.
- Use the manual's cooling procedure. Do not assume water is cool because the heat is off.
- Know which accessible shutoff you can use if water escapes unexpectedly.
- If the unit has gone many years without maintenance, ask a plumber to assess its condition first.
Tools and Supplies You'll Need
Essentials
- Your water heater's model-specific owner's manual
- Garden hose compatible with the drain connection, suitable for the discharge temperature
- Safe floor drain or another approved place to direct water
- Bucket or shallow pan for small drips
- Absorbent towels
- Protective gloves and eye protection
May be needed, depending on the model
- Screwdriver designed for the drain-valve operating slot
- Hose washer or suitable connector if required by the fitting
- Flashlight to read the model/valve labels
Do not use excessive force, remove a pressurized valve, disconnect water or gas piping, or insert tools into a clogged drain.
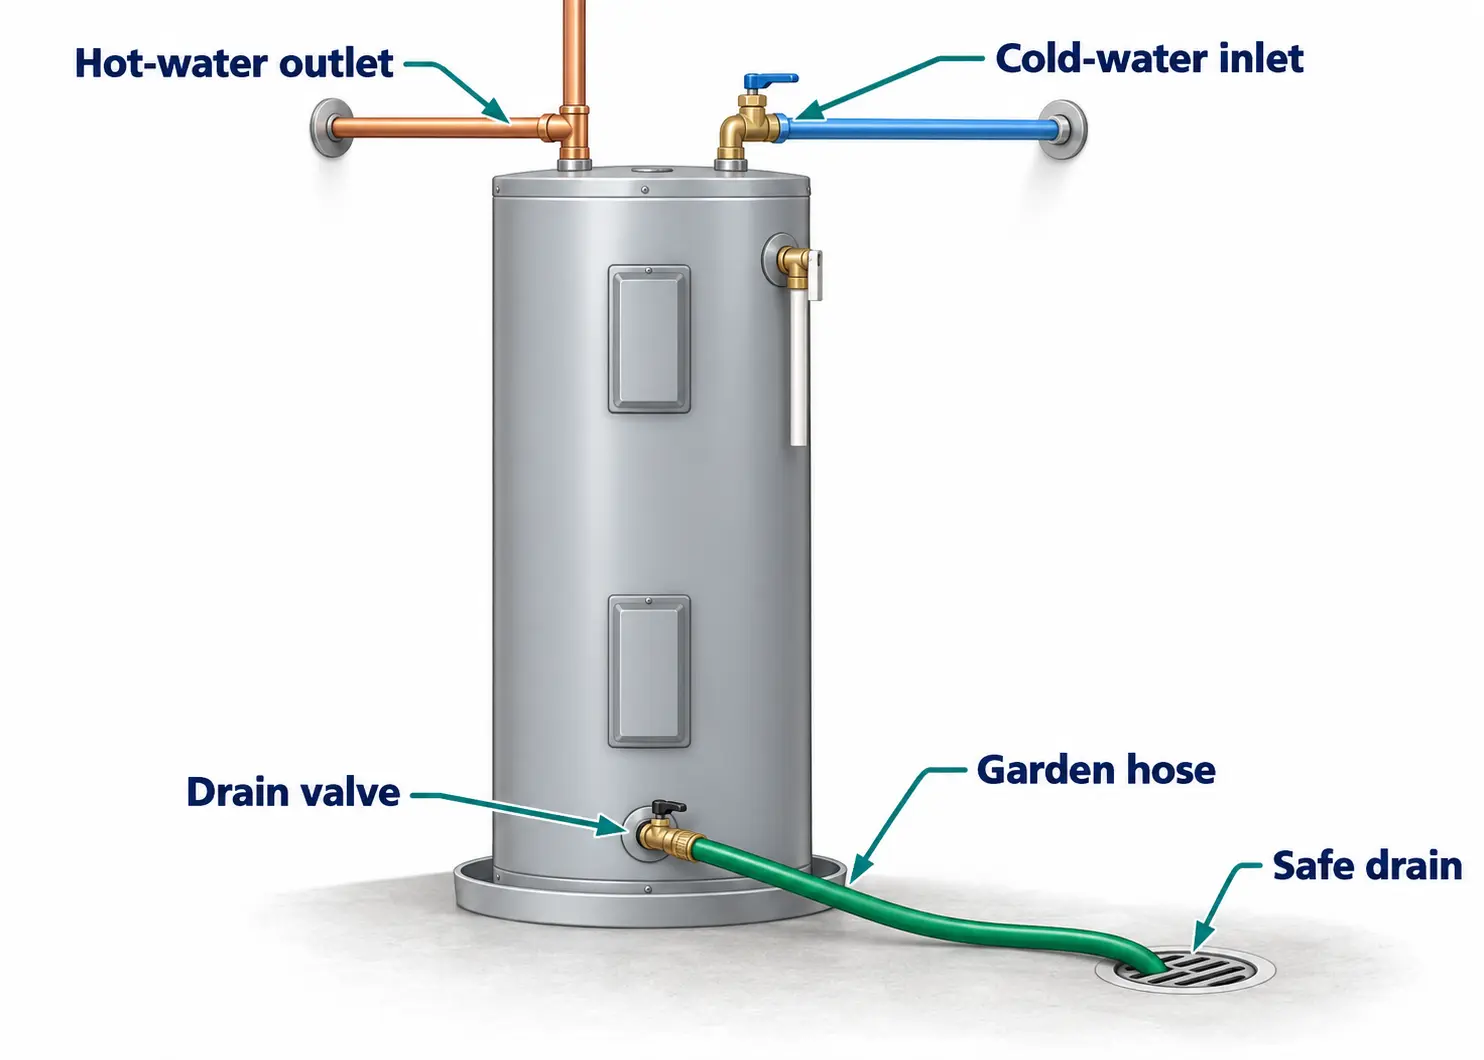
How to Flush a Tank Water Heater: Step by Step
The sequence below explains a common full-drain-and-flush approach used in several manufacturer manuals. It is not universal: some heaters specify different drain amounts, control settings, valve sequences, or methods for admitting air. If your manual differs, follow the manual.
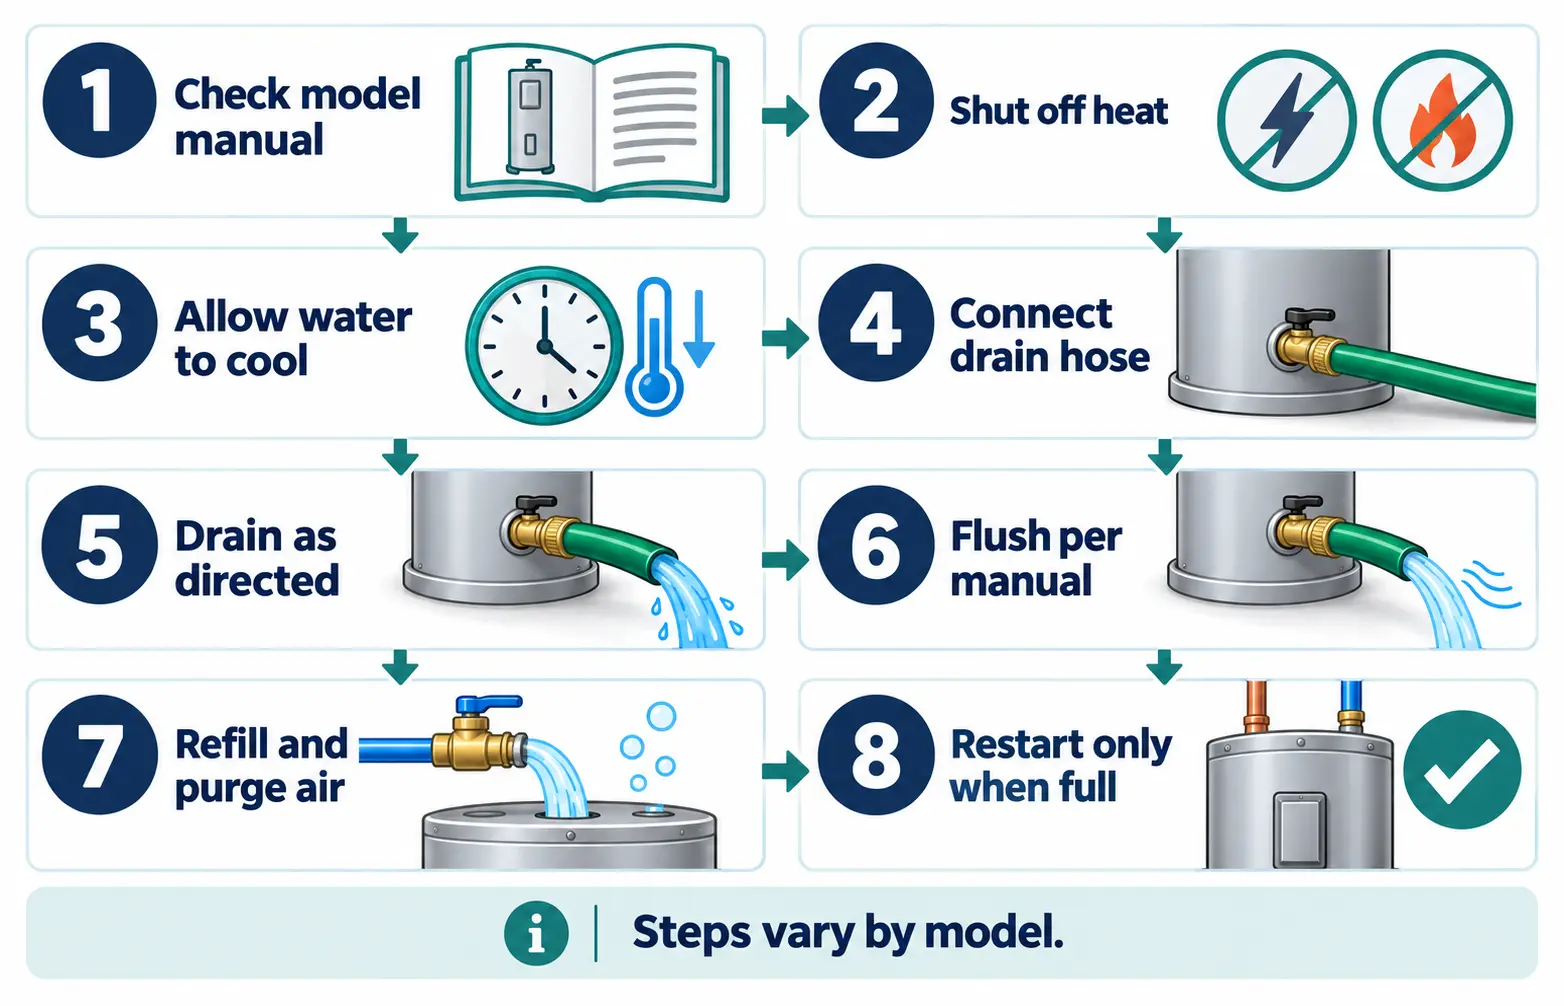
Step 1: Find your model instructions and inspect the setup
Read the identification label and get the manual from the manufacturer. Find the cold-water inlet shutoff, bottom drain valve, nearby hot-water faucet, and a drainage route that can safely handle the water. Do not begin if the drain fitting looks damaged, if rust or water is appearing around the tank, or if you cannot establish a safe discharge path.
Check that a hose can be firmly attached without striking, bending, or stressing any valve. The hose end must remain secured where a surge of water will not burn anyone or damage the building.
Step 2: Turn off the heating source correctly
For a conventional electric water heater, switch off the correct circuit breaker or disconnect identified for the heater. For a gas unit, follow its specific shutdown instructions for the gas control and supply. Some power-vented gas models also need electrical power isolated. Hybrid units likewise have electrical shutdown requirements.
Do not drain while the heater is running. If you cannot positively identify the correct circuit, control, or model instructions, stop and have a professional perform the service. Do not remove covers to work on live electrical parts.
Step 3: Let the water cool and set up a safe drain
Hot water may remain dangerous long after the unit has been shut off. Allow it to cool as your manufacturer's instructions direct; some guides recommend waiting after shutdown or carefully running a hot-water faucet until the water is cool enough for the procedure. Never rely on a fixed waiting period for every tank.
Keep people clear of the discharge. Run the hose to a drain or collection point appropriate for warm water and mineral sediment. Check the hose for kinks and ensure the outlet cannot whip loose or overflow a bucket.
Step 4: Connect the hose and prepare the tank to drain
With the heat off and water sufficiently cooled, attach the hose to the drain valve at the bottom of the tank. Manufacturer full-drain procedures commonly direct you to close the cold-water inlet at this stage and open a nearby hot-water faucet to allow air into the system as water drains.
Some instructions mention operating the temperature and pressure relief (T&P) valve. That is not a universal flushing step. Opening a T&P valve can release scalding water and may create an additional leak if it fails to reseat. Where your manual permits a hot faucet instead, that is usually the simpler way to admit air. Operate the T&P valve only if the applicable instructions specifically call for it and you understand the safe discharge requirements.
Step 5: Open the drain valve and remove water as instructed
Carefully open the drain valve using only the method specified for that valve. Watch the hose outlet and watch for leaks where the hose joins the tank. Sediment-laden water may initially be discolored or contain visible grit.
How much should you drain? Follow the model's instructions. A manual requiring a full-tank flush may call for draining the tank completely before the next stage; other maintenance instructions describe drawing off a smaller amount of sediment-rich water. Do not assume every heater must be emptied for every maintenance task.
If the flow suddenly stops, do not force a suspected sediment-clogged valve or remove it while water remains inside. See the troubleshooting table and contact a qualified plumber.
Step 6: Flush sediment with fresh cold water, if your manual directs
For a full-drain flushing method, once the tank has emptied, some manufacturer manuals instruct you to leave the hose connected and the drain valve open, then reopen the cold-water inlet to wash loose sediment through the bottom drain. You may be instructed to stop the cold supply, allow remaining water to drain, and repeat until discharge is noticeably clearer.
The different positions of the cold-water valve are intentional: closed during initial draining, then open to supply fresh water for sediment flushing. Always follow your particular manual and stay with the hose while water is running. A flush may remove loose material but cannot guarantee removal of hardened scale.
Step 7: Close the drain, refill the tank, and purge air
After completing the manufacturer-prescribed flush, close the drain valve without overtightening. Restore the cold-water inlet and leave an appropriate hot-water faucet open so displaced air can escape as the tank fills. Watch for drips at the drain, hose connection, and visible fittings. Remove the hose only when the valve is closed and it is safe to do so.
Allow the hot-water faucet to run until you have a continuous, steady flow and the air has been purged as directed by the manual. Some specific manuals call for additional running time, so follow your own model's requirement. A closed drain valve alone does not mean the tank is full. If water does not flow steadily or you cannot confirm a filled tank, leave the heat off.
Step 8: Restore operation only after confirming the tank is full
Recheck the drain valve for leakage, confirm the refill and air-purge steps are complete, and make sure all hoses and work materials are clear of the appliance. Only then restore the heat source using the manufacturer's startup instructions. In an electric tank, powering exposed elements can damage them (often called dry firing).
Gas units must be restarted according to the exact instructions on the appliance or in its manual; do not improvise a relighting or reset procedure. If you notice a leak, abnormal noise, persistent failure to heat, a safety warning, or a gas-related concern, stop using the heater and seek appropriate professional help.
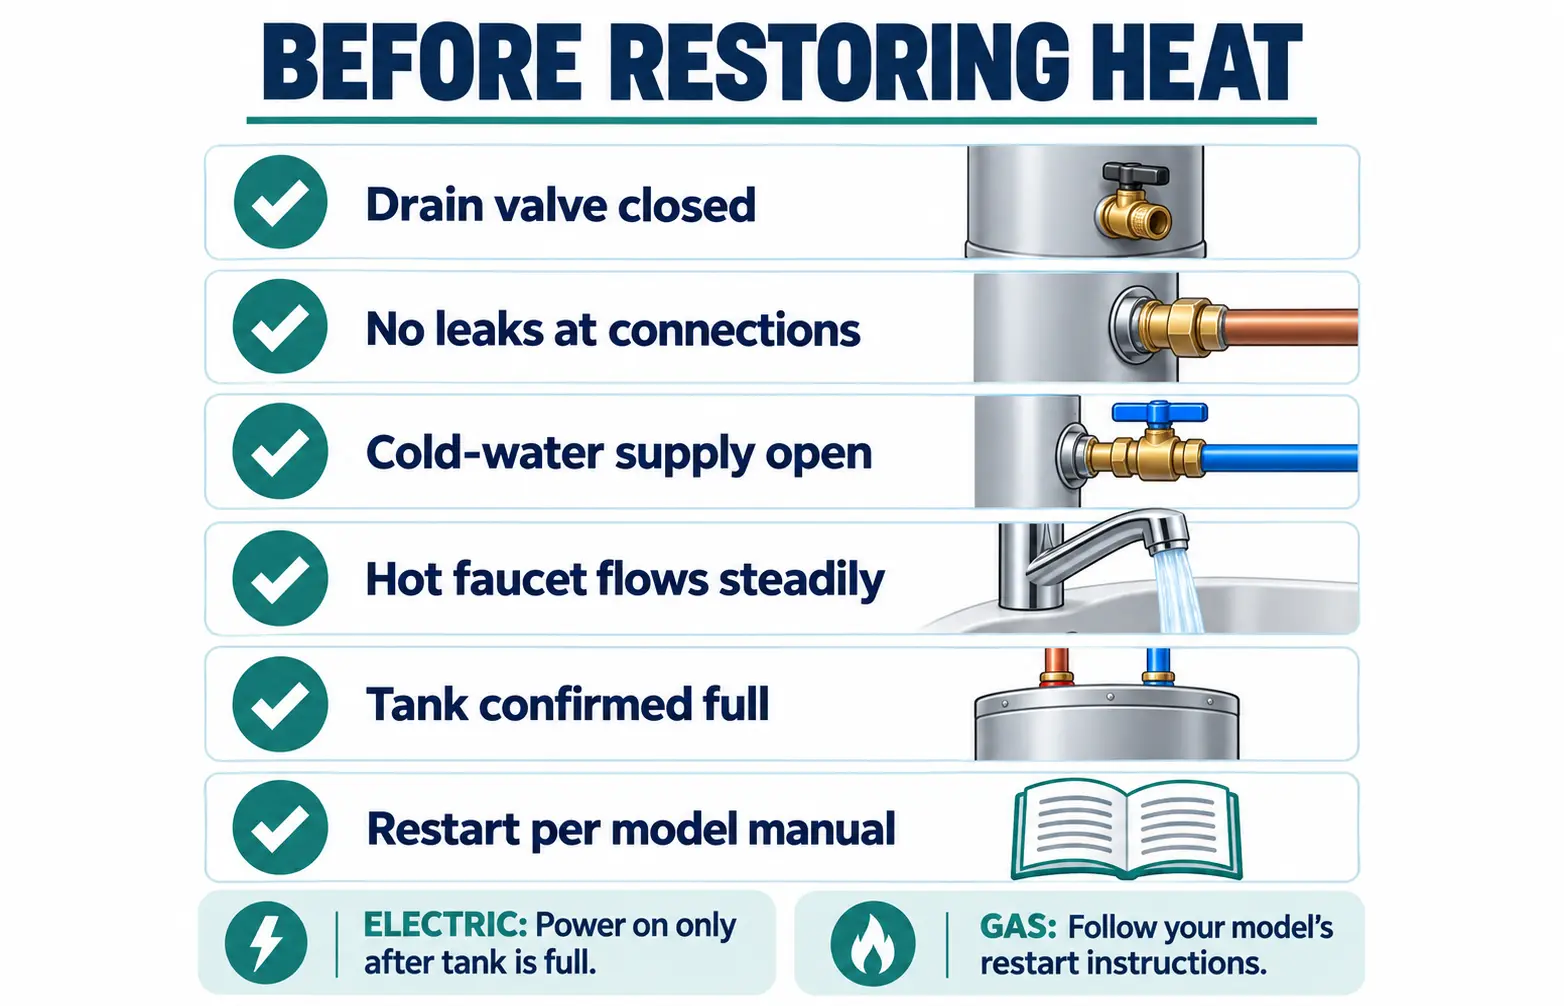
Final safety check before switching the heater back on
Drain valve closed and not dripping. Cold-water supply restored. Hot faucet flowing steadily after the manual's air-purge procedure. Tank confirmed full. No active leak or abnormal condition. Only then restore heat according to the manufacturer's instructions.
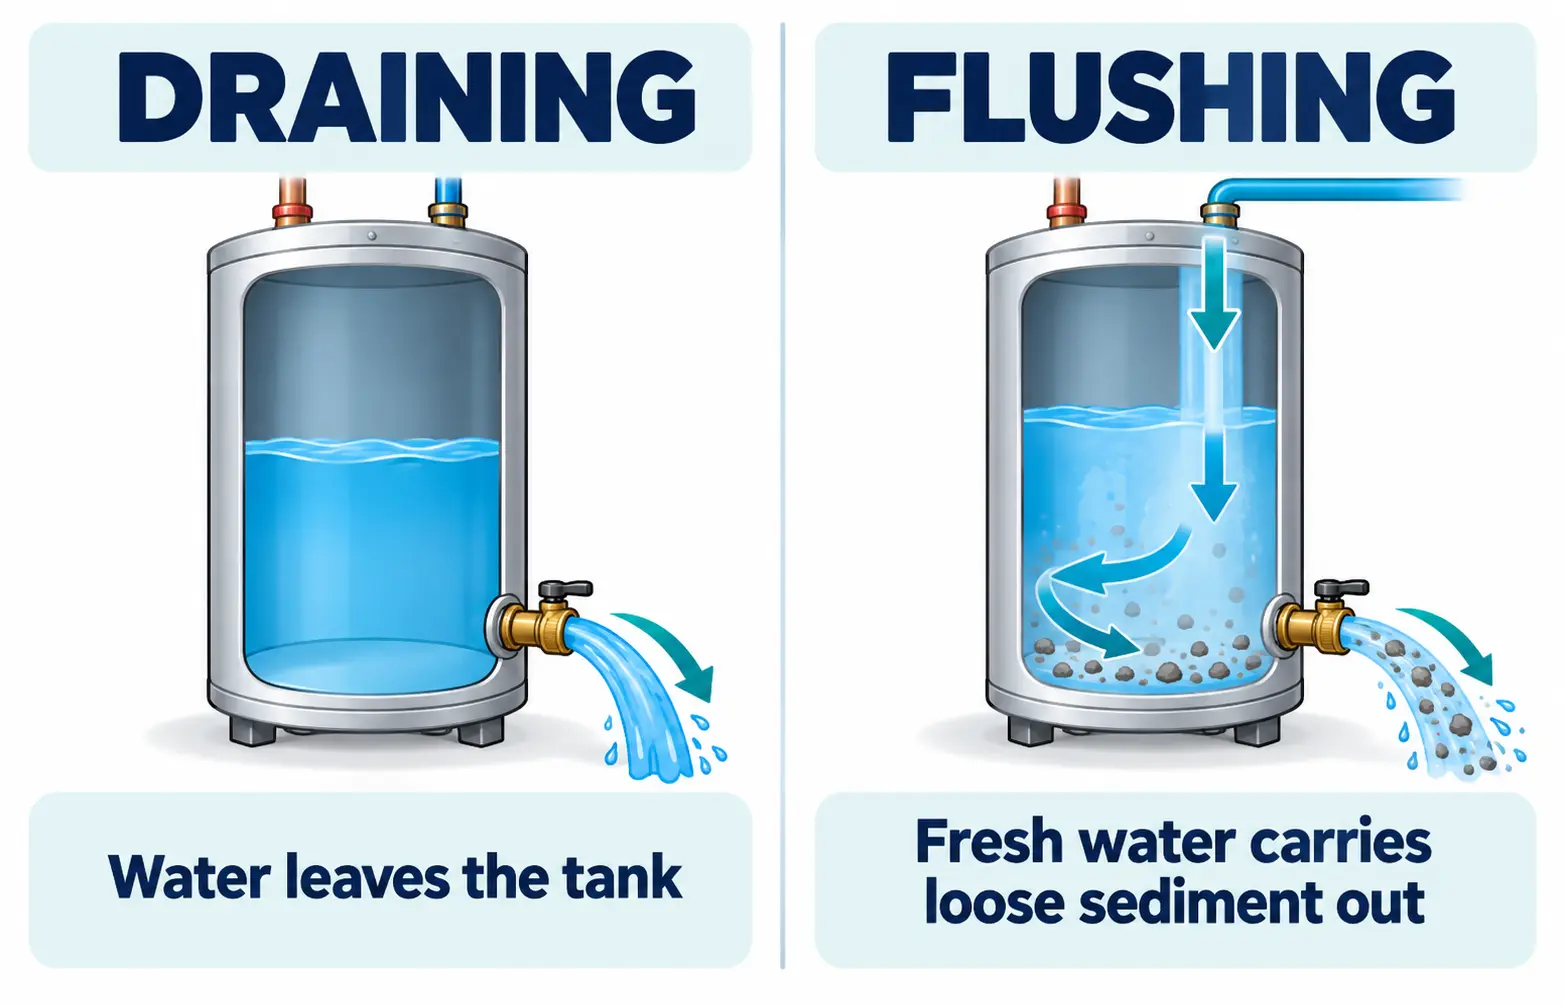
Draining vs. Flushing a Water Heater: What's the Difference?
The terms are sometimes used interchangeably, but they describe two different parts of the job:
Draining
Letting some or all of the existing water out through the drain valve. A small drain may be part of an inspection; a full drain may prepare the tank for a more thorough flush.
Flushing
Moving fresh water through the tank so loose sediment can exit through the drain. Depending on the model, this may follow a full drain or use a different approved method.
Simply opening the drain does not guarantee that all mineral deposits will leave the tank. A buildup that has hardened over time may not clear with ordinary homeowner maintenance. Avoid pouring vinegar, acid, or commercial descaler into a storage tank unless the manufacturer explicitly approves that process for your model.
Should You Drain the Whole Tank or Only Some Water?
There is no single answer for every heater. Some manuals, including a Bradford White hybrid tank manual, explain a full-drain method before flushing. Some maintenance instructions also describe draining a few gallons for other tasks or sediment checks. The correct amount depends on your water heater and the maintenance procedure you are actually performing.
Do not treat a quick sediment draw-off as proof that a full tank flush is unnecessary, and do not fully drain a heater merely because an online checklist says to. Confirm the model's instructions, then choose the matching method. If the manual is unavailable or confusing, professional service is the safer choice.
How Often Should You Flush Your Water Heater?
Once a year is a common starting recommendation for residential storage-tank water heaters, but it is not a universal maintenance rule. Rheem's general guidance suggests that some households with hard water may need more frequent flushing. A. O. Smith also emphasizes model-specific schedules and observation of sediment conditions. Always prioritize the schedule in your own manual.
| Situation | Reasonable next step |
|---|---|
| Routine maintenance with no known water issues | Check the owner's manual; an annual interval is commonly suggested by manufacturers. |
| Hard water or frequent visible sediment | Review whether the manufacturer's schedule calls for more frequent maintenance. |
| Rumbling, reduced hot-water capacity, or cloudy water | Investigate the symptom rather than assuming sediment is the only cause. |
| Older, corroded, or long-neglected water heater | Have a plumber assess its condition before attempting to operate an old drain valve. |
Flushing may help reduce loose sediment, but it cannot restore a corroded tank or repair defective components. If water is coming from the tank or fittings, use a water heater leak troubleshooting guide instead of assuming the problem is routine sediment.
What to Do If the Water Heater Won't Drain or Something Goes Wrong
Many of the hardest questions arise during the flush, not before it. The following checks stay on the observation and stop-work side of homeowner maintenance; they are not instructions to open pressurized parts.
| What you notice | Safe response | When to stop |
|---|---|---|
| Little or no water exits the hose | Check for an external hose kink and confirm you are following the manual's valve/faucet positions. | If the drain might be clogged, do not force it, probe it with a wire, or remove it; call a plumber. |
| Water is still carrying sediment | Continue only within the flush/repeat procedure specified for that model. | If the discharge does not improve or sediment blocks the valve, seek professional help. |
| Water leaks around the drain valve | Stop and use an accessible, familiar water shutoff if it is safe to do so; contain drips without touching hot water. | Do not restore heat until the leak is corrected and the tank can be refilled safely. |
| Hot faucet sputters during refill | Air often leaves through a hot faucet during refill; follow the manual's full air-purge procedure. | If steady flow cannot be confirmed, leave the heat off. |
| Rumbling or poor heating remains afterward | Do not assume more flushing will fix it. Other heating or plumbing faults may be involved. | Use a water heater not heating guide or contact a professional. |
| Gas odor or carbon monoxide alarm | Leave immediately and contact emergency services or the gas utility from a safe location. | Do not continue flushing, operate switches, or attempt a restart. |
Does a Tankless Water Heater Need Flushing?
A tankless unit does not have a large storage tank where sediment settles in the same way. Many tankless heaters instead require descaling of internal water passages or a heat exchanger, using service valves and a model-approved cleaning process. The pump, solution, valve settings, and circulation time differ by appliance.
Do not apply the garden-hose drain steps above to a tankless model. Refer to its own descaling instructions or have a qualified service provider do the work. A. O. Smith explains this difference in its water heater draining and descaling guide.
Frequently Asked Questions
Do you turn off the water before flushing a water heater?
Many full-drain procedures start with the cold-water inlet closed, then reopen it while the drain stays open to flush out loose sediment. Other procedures differ. Follow your water heater's manual rather than leaving the inlet in one position throughout every stage.
Do I have to drain the entire tank to flush it?
Not every model and maintenance task requires the same drain volume. Some manufacturers specify a complete drain before a full sediment flush, while other tasks use a partial drain. Use the instructions for your actual model and procedure.
Should I open the pressure relief valve when draining?
Not automatically. Some manufacturer instructions permit a nearby hot-water faucet to admit air; others describe operating the T&P valve. The T&P valve is an important safety device and may discharge scalding water. Follow the specific manual and valve instructions, or ask a professional.
Can you flush an electric water heater?
Yes, if the manufacturer permits homeowner maintenance and the unit is in safe condition. Shut off the correct power supply first. The tank must be completely refilled and air purged according to the manual before power is restored; otherwise, heating elements may be damaged.
How do I know the tank is full before turning the heater back on?
With the drain closed and cold supply restored, use the designated hot-water faucet to let air escape. A steady flow without trapped-air sputtering is an important indication, but follow any additional model-specific refill and purge requirements. If you cannot confirm the tank is full, do not turn the heat on.
How long does flushing a water heater take?
The time varies with tank size, water pressure, sediment, hose/drain arrangement, and how long the water must cool. Allow enough time to shut down, cool, flush, fully refill, and check for leaks; don't rush a safety step to meet a generic estimate.
Will flushing fix a noisy water heater?
If loose sediment is contributing to rumbling or popping, a model-approved flush may help. Noise can have other causes, and hardened deposits may remain. Persistent noise should be evaluated rather than repeatedly flushing without a diagnosis.
Can I flush a water heater that has never been flushed?
Assess the heater's condition first. If it is old, visibly corroded, leaking, or has a stuck drain valve, have a qualified plumber inspect it before attempting service. Do not force unfamiliar valves or assume a neglected tank will drain normally.
Sources and Manufacturer Guidance
Manufacturer instructions should guide maintenance on your exact model. These references support the general safety and flushing concepts in this article; they are not interchangeable service manuals.
- A. O. Smith — How to Drain & Flush a Water Heater: storage-tank flushing, drain setup and tankless distinctions.
- A. O. Smith — Water Heater Maintenance Guide: shutdown, filling the tank before restart, and electric dry-fire risk.
- Rheem — How Often to Flush Your Water Heater (And How to Do It): maintenance intervals and conditions for professional help.
- Bradford White — Hybrid Electric Heat Pump Water Heater Installation and Operation Manual (PDF): an example of a model-specific full-drain/flush and refill procedure.
- Con Edison — Gas Leak: Frequently Asked Questions: leave immediately, avoid electrical switches and report the leak from safety.
- CDC — You Can Prevent Carbon Monoxide Exposure: evacuate and call 911 if a CO alarm sounds.
Editorial note: Home System HQ provides research-based homeowner information. It does not replace instructions from the equipment manufacturer or an on-site evaluation by a qualified professional.