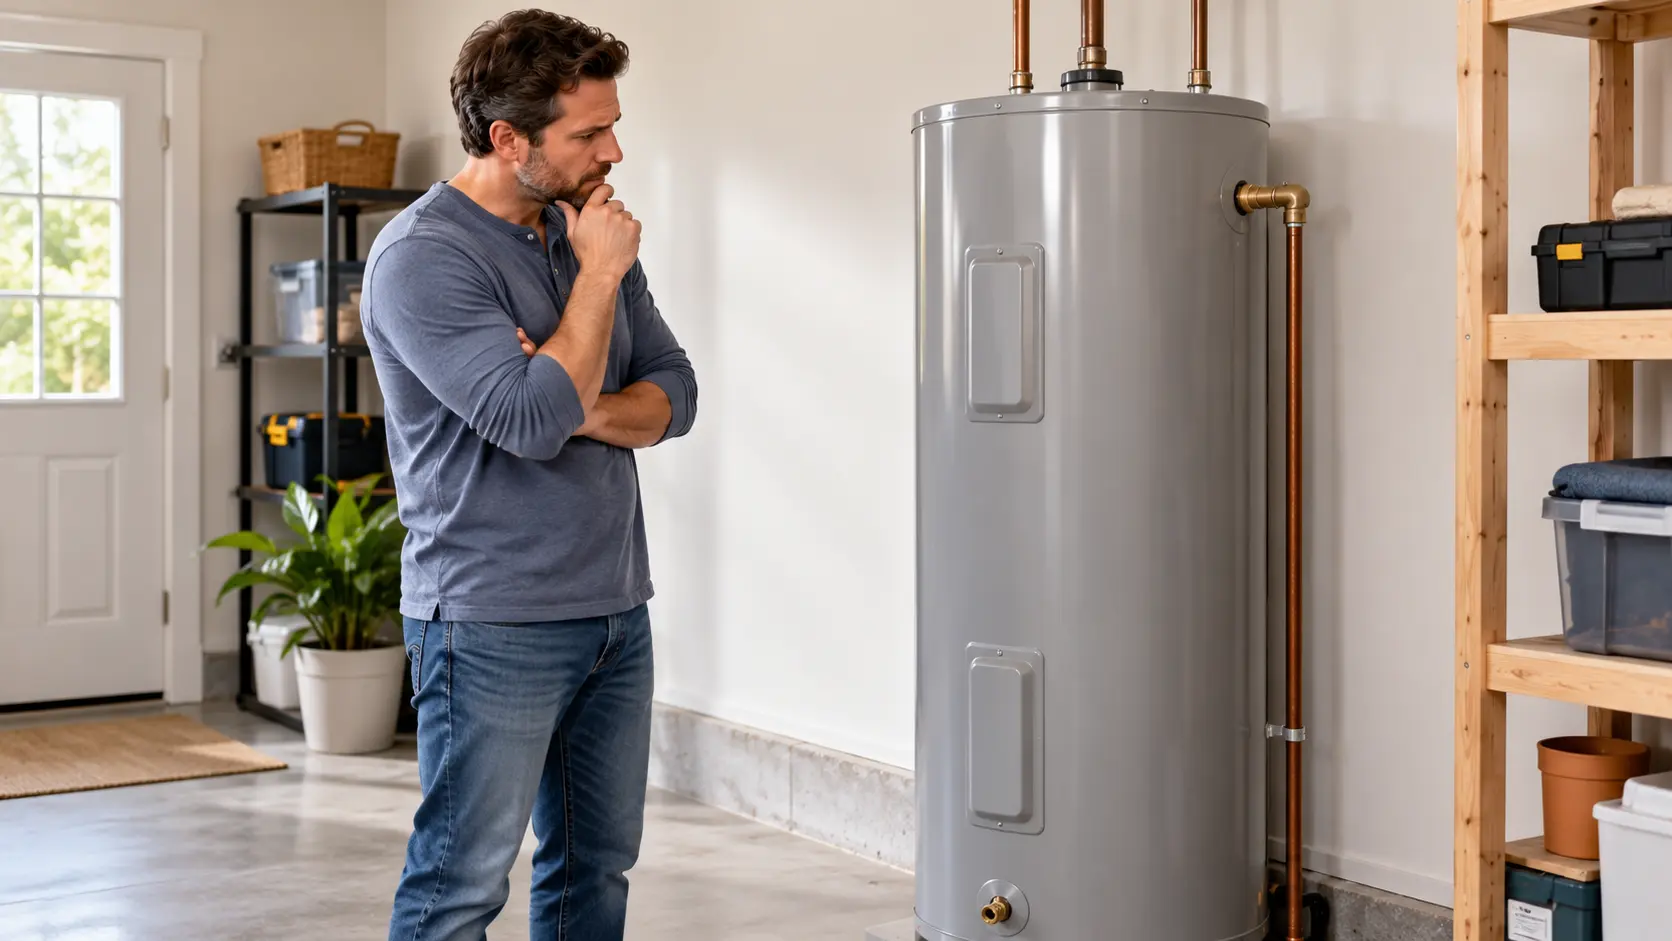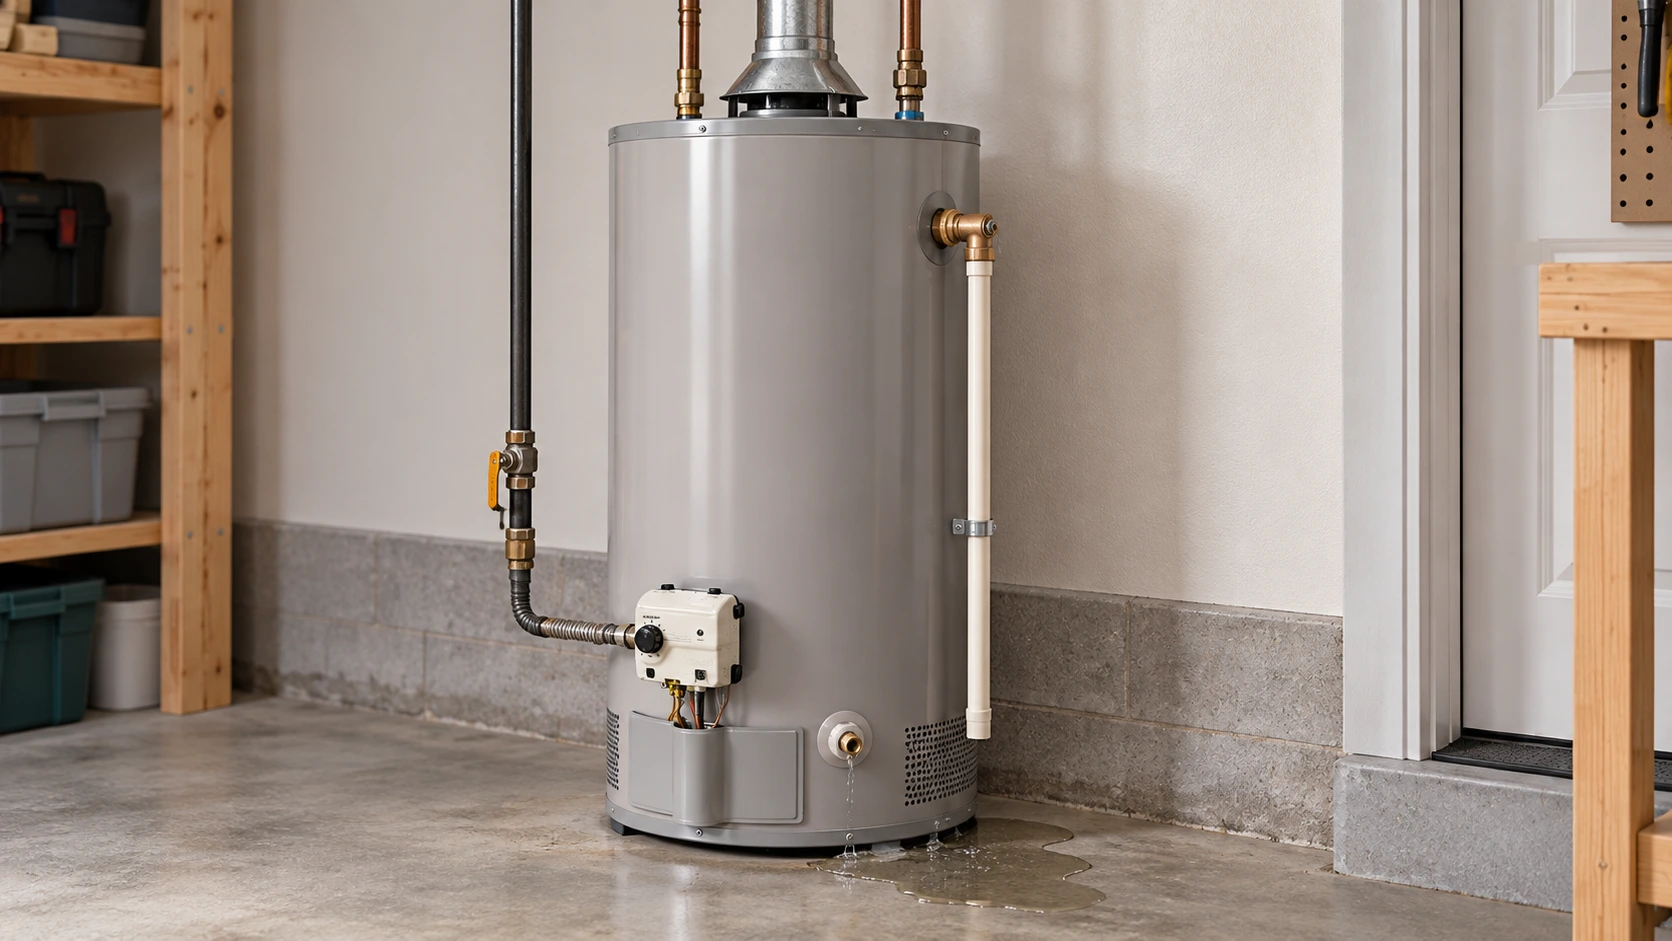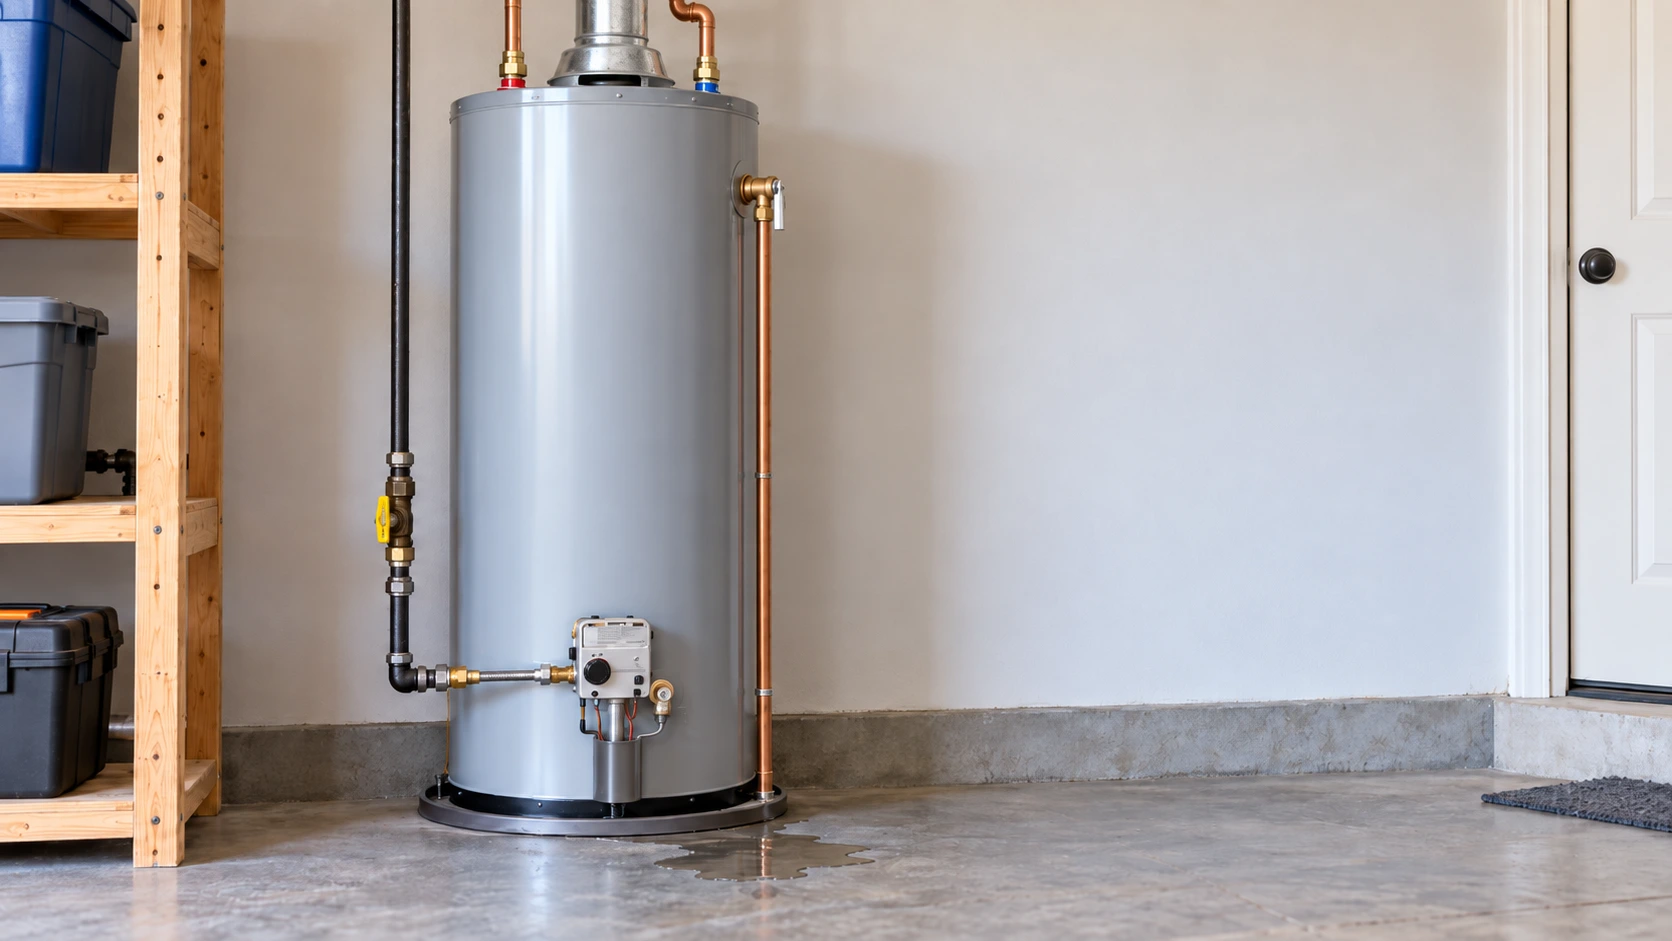
Finding water around the base of your water heater can be alarming. But a puddle underneath the unit does not automatically mean the tank has split. Water may be dripping from the drain valve, traveling down from plumbing connections, exiting the temperature-and-pressure (T&P) relief valve's discharge pipe, or forming as condensation. A damaged inner tank is another possibility—and usually the one that requires replacement.
The safest next step is to rule out immediate hazards, stop using the heater until the leak is assessed, and identify where the water first appears without opening the appliance. This guide focuses on residential gas and electric storage-tank water heaters; tankless and heat-pump models have different components and may need different checks.
Stop and get help if any danger sign is present
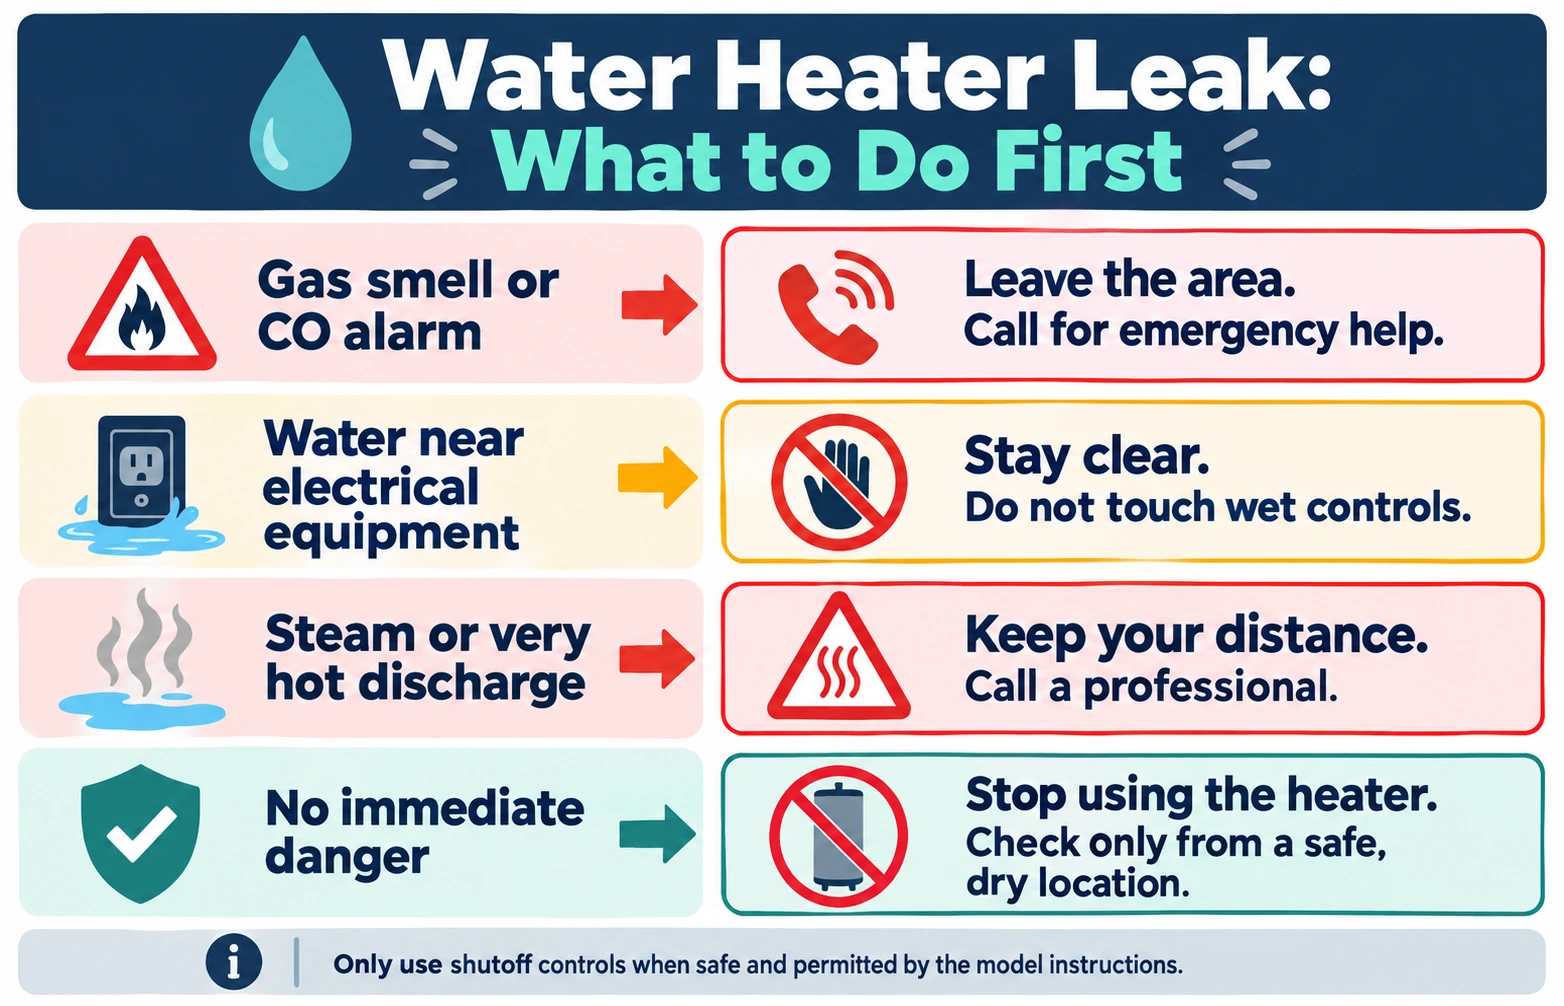
If you smell natural gas or propane, hear gas hissing, or a carbon monoxide alarm sounds, leave the building immediately and contact emergency services and your gas utility from a safe location. Do not touch switches or controls while investigating a suspected gas leak.
If water has reached electrical equipment, do not step into standing water or touch wet controls. Keep clear of steam or forceful hot-water discharge from a relief pipe. Contact qualified emergency assistance as appropriate.
Quick answer
- Water at the drain valve: may indicate a repairable valve or connection issue.
- Water at the T&P discharge pipe: could signal a pressure, temperature, thermal-expansion, or valve problem that requires diagnosis.
- Water running down the jacket: may have started at an upper pipe or fitting.
- Moisture after a heating cycle: could be condensation on certain units, but do not assume persistent pooling is harmless.
- Water traced to a failed inner storage tank: generally means replacement rather than patching.
1. What to do first when water is leaking near the bottom
Even a slow, unexplained leak deserves prompt attention. Water damage can grow, and an unresolved leak can worsen. However, the right immediate action depends on whether there is a gas, electrical, scalding, or other emergency risk.
Step 1: Check for urgent hazards
Stay away if you detect fuel-gas odor, a CO alarm, sparking, burning smells, or steaming or forceful hot-water discharge. Evacuate when appropriate. Do not continue troubleshooting around an active hazard.
Step 2: Stop using the heater
Avoid further hot-water use while the source is unknown. Do not restart a heater that was exposed to flooding, an electrical problem, or an unresolved safety-device discharge.
Step 3: Isolate utilities only if safe
If you can reach dry, clearly identified controls safely and know your specific heater's instructions, turn off its energy source and close the cold-water inlet shutoff as directed. Never walk into water to reach a breaker, operate wet controls, or guess at gas-control settings. Otherwise, have a professional isolate the unit.
Step 4: Observe, record, and call
From a dry position, look for the first visible drop at an accessible fitting, the drain valve, the end of the T&P discharge pipe, or the cabinet seam. Note whether water is spreading, take photos, and arrange qualified diagnosis.
2. Does water at the bottom mean the water heater tank is leaking?
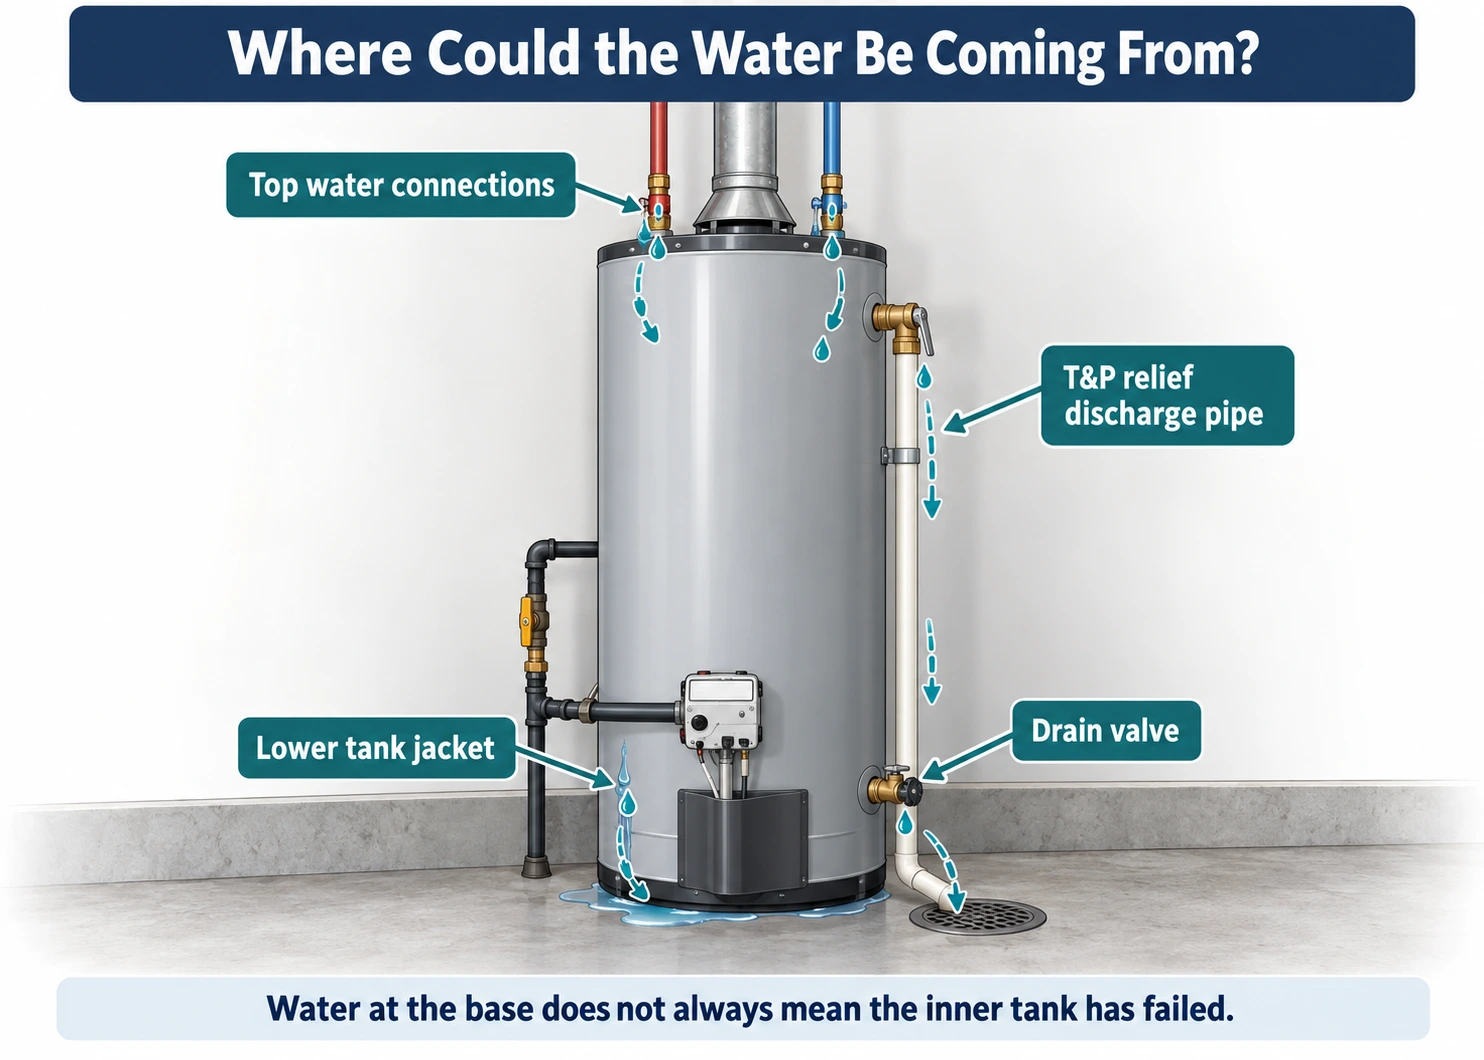
No—not by itself. A storage water heater has an inner water-containing tank, insulation, and an outer metal jacket. Water can run along the outside of the jacket or collect inside a drain pan before appearing at the lowest point. A drip seen near the base may therefore originate well above it.
A. O. Smith Technical Bulletin #51 lists seven possible sources of a puddle on the floor, including condensation, valve and piping leaks, model-specific component connections, and a true tank leak. Rheem's leaker-diagnosis bulletin also examines other water sources before deciding that a tank is defective.
A little rust on the exterior is not conclusive evidence that the pressurized tank has a hole. Conversely, a continuing leak from the lower jacket or base—especially after external sources have been ruled out—needs professional attention, because a breached inner tank generally cannot be safely repaired.
3. Seven possible causes of water leaking from the bottom of a water heater
These are possible sources, not a ranking of how often each one occurs. Your exact heater model determines which parts are present and where they are located.
1. A leaking drain valve near the base
The drain valve is typically located low on a storage-tank heater. A drip at its outlet or threaded connection can fall directly onto the floor, making it look as though the bottom of the tank is leaking. A damaged valve or connection may be serviceable without replacing the whole heater, but opening or removing the valve while the tank is hot and pressurized is hazardous.
What you may notice: droplets centered on the valve area, moisture at the drain outlet, or a puddle beginning directly beneath that point. Next step: photograph the location and have a qualified plumber confirm whether the valve, its connection, or the tank fitting is leaking.
2. Water coming from the T&P relief valve discharge pipe
The temperature-and-pressure relief valve is a critical safety device. Its discharge pipe may terminate near the floor, so water released there can look like a bottom leak. Possible causes include thermal expansion in a closed plumbing system, abnormal temperature or pressure, and a relief-valve problem. The location of the water is a clue—not a complete diagnosis.
What you may notice: the floor or drain pan is wet directly below the end of a discharge pipe. Next step: do not plug the pipe, operate the test lever, or attempt a valve replacement. Seek a plumber's assessment; steaming or unusually forceful hot discharge calls for urgent help.
3. An upper supply pipe or fitting that drips down the side
Cold-water supply fittings, hot-water outlet fittings, nearby plumbing, or even another appliance can leak onto the heater. Water can travel down the outer jacket and gather at its lowest edge. Condensation on cold piping can create a similar trail of moisture.
What you may notice: wet pipe joints or streaks running downward from above. Next step: use a flashlight only from a safe, dry location; do not tighten hot or pressurized fittings as a quick test.
4. Condensation mistaken for a leak
On certain gas-fired storage heaters, moisture in combustion gases can condense on cooler surfaces, particularly during particular operating conditions. Cold supply lines may also sweat in humid spaces. A. O. Smith explains this in its condensation bulletin. Some heat-pump water heaters have an intentional condensate collection and drain system, which is a different issue.
What you may notice: moisture associated with certain heating cycles or humid conditions. Next step: do not assume that water disappearing later proves the appliance is sound. Persistent or recurring pooling, unusual noises, or unclear source locations still warrant inspection.
5. An electric heating-element gasket or connection leak
On some electric tank models, a heating-element gasket or related water-side connection can seep. Water may then emerge around the cabinet rather than from an obvious exposed fitting. This does not mean the inner tank has failed, but diagnosing it may require opening an electrical access area.
What you may notice: unexplained water at the side or lower jacket on an electric heater. Next step: keep electrical compartments closed and request qualified service. Never remove an access cover or test a live circuit as part of a puddle check.
6. A gas-control assembly's water-side connection on certain gas models
Some gas storage heaters can develop a water leak at the threaded connection where the gas-control assembly attaches to the water-containing tank. This is a specific water-side leak point, not the same thing as escaping fuel gas. The gas control is not a homeowner-serviceable part for this problem.
What you may notice: moisture near a gas-control assembly on a model where this connection is present. Next step: do not loosen, remove, or adjust the assembly. If you smell fuel gas, stop all water-leak checks and follow the gas emergency instructions above.
7. A corroded or breached inner storage tank
If a professional traces the water to a breach in the inner steel storage tank rather than an external valve, pipe, or gasket, replacement is generally necessary. Manufacturers do not treat a failed pressurized tank wall as a routine part that can be patched, welded, or sealed with an additive.
What you may notice: continuing seepage at the lower jacket or base with no external source found. This pattern raises concern but does not by itself prove an internal breach. Next step: keep the heater out of use until it has been assessed and ask about replacement, warranty eligibility, and water-damage prevention.
4. Bottom-leak symptoms: what they may suggest
Use these observations to explain the problem to a plumber—not to diagnose or dismiss a potentially unsafe condition.
| What you see | Possible source | Appropriate next step |
|---|---|---|
| Water directly at the lower drain outlet | Drain valve or its connection | Professional valve/fitting assessment; do not open a hot drain |
| Water beneath the end of a vertical discharge pipe | T&P discharge; pressure, heat, expansion or valve issue | Keep the outlet unobstructed; get professional diagnosis |
| Wet pipes or downward trails on the jacket | Upper fittings, nearby piping, condensation | Record where the moisture begins; arrange inspection |
| Moisture around an electric access-panel area | Potential heating-element gasket/connection | Keep covers closed; use qualified electrical/plumbing service |
| Moisture at a gas control's water-side fitting | Model-specific water connection | Leave the assembly untouched; call a qualified technician |
| Continuous seepage at lower jacket after other sources are excluded | Possible inner-tank breach | Prompt replacement assessment; do not attempt tank patching |
The clues above are nonexclusive. A drain pan can collect water from more than one source, and intermittent leaking can make the starting point hard to identify.
5. A safe visual check: find where the water begins
If there are no emergency signs, the area is dry and safely accessible, and you are not opening or operating any component, these observations can help narrow down what to report:
- Look above the unit first. Are exposed supply pipes or connections wet? Could water be coming from an adjacent wall, pipe, or appliance?
- Locate the T&P discharge termination from a safe distance. Is the floor wet directly beneath it? Do not touch the outlet or its water.
- Observe the accessible drain-valve area. Are drops appearing at that valve, or only farther inward beneath the jacket? Do not turn the valve handle.
- Note where moisture first reappears. If the area can be documented without getting close to energized equipment or hot discharge, take a photo. Do not wait through an active or increasing leak just to complete an observation.
- Record the model and symptoms. Note gas or electric, approximate age, when the water appeared, whether the leak is continuous, and any recent plumbing work. Read a visible label only if safely accessible.
6. Gas vs. electric water heater leaking from the bottom
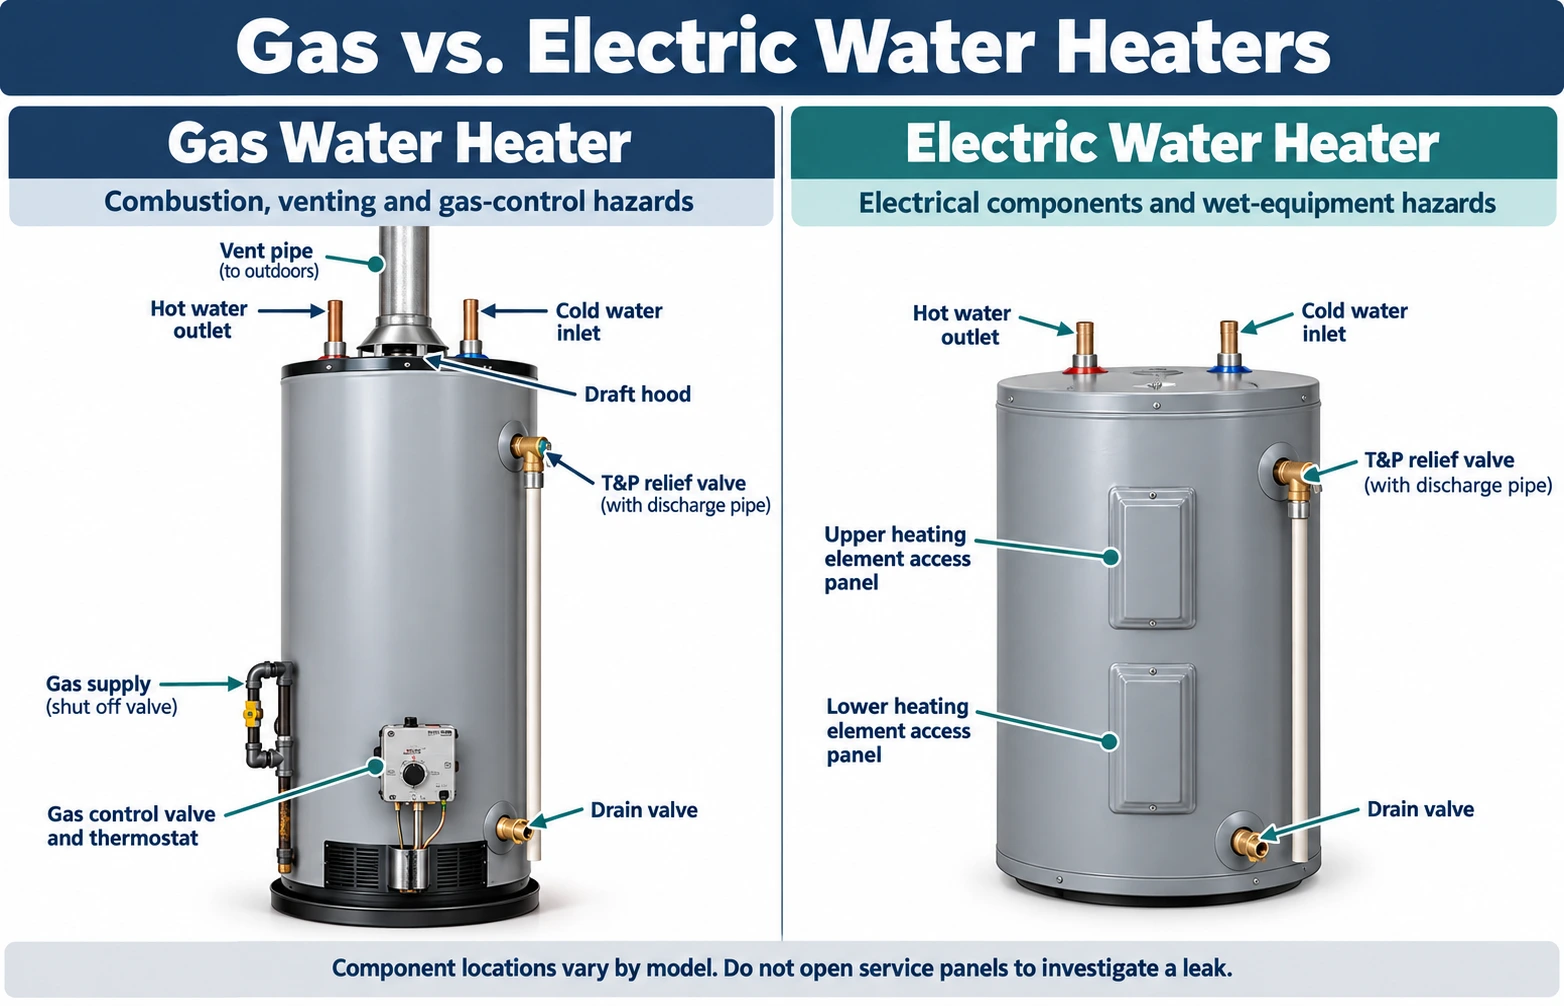
The shared possibilities—drain valve, relief discharge, upper piping, condensation on cold lines, or a tank breach—should still be considered. The additional possible leak points and safety hazards depend on the design.
Gas storage-tank water heater
- Gas combustion can produce condensation under certain conditions.
- Some models have a water-side threaded connection at the gas-control assembly.
- Fuel-gas odor, abnormal combustion or a CO alarm is not ordinary water-leak troubleshooting.
- Do not remove gas controls, relight a malfunctioning burner, or alter venting.
Electric storage-tank water heater
- Heating-element gaskets and water-side element connections are possible leak locations on applicable models.
- Electrical covers conceal components that may be energized; leave them closed.
- Water contacting wires, panels, or other electrical equipment presents a shock hazard.
- Never handle wet controls or step into pooled water to reach a breaker.
If you have a heat-pump (hybrid) water heater, condensate lines may be a normal part of the design; a clogged or disconnected condensate drain still requires attention. If you have a tankless unit, its leak locations and diagnostic procedures differ from those of a storage-tank heater. Consult that specific model's manual.
7. Can a water heater leaking from the bottom be repaired—or does it need replacement?
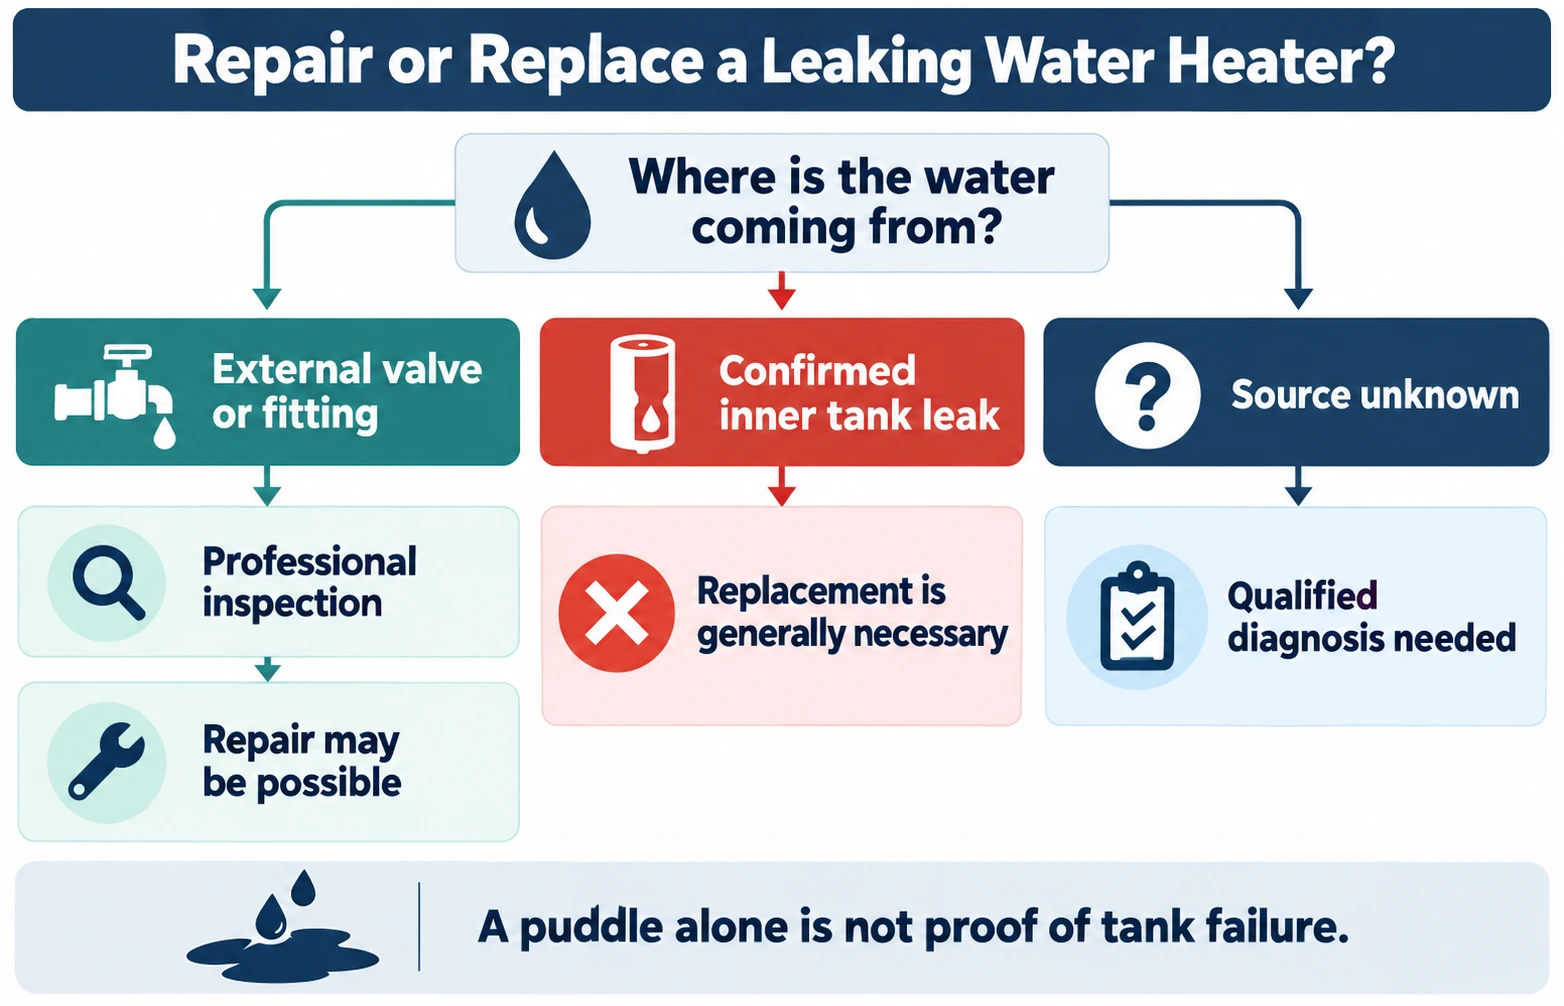
The most important distinction is a serviceable external part versus a failed inner tank. Some valve, connection, and gasket problems may be repaired by a qualified person. A confirmed inner-tank breach generally means the entire storage water heater must be replaced.
| Finding | Typical decision | Important qualification |
|---|---|---|
| Drain valve or accessible external connection is leaking | Repair may be possible | Have a professional confirm the actual point of failure and parts compatibility. |
| T&P discharge is wet | Find the cause before choosing parts | The valve may be responding to a separate pressure or temperature condition. |
| Model-specific gasket or water-side connection leaks | Repair may be possible | Gas-control and electrical access work are not generic DIY tasks. |
| Internal pressurized storage tank is breached | Replace the heater | Do not weld, epoxy, or seal a failed tank wall. |
| Source remains uncertain | Professional diagnosis first | Do not replace the heater solely because the floor is wet. |
Bradford White's repair-versus-replacement guidance distinguishes smaller serviceable faults from tank leaks that warrant replacement. Age, the scope of damage, warranty terms, repeated repairs, and the estimate for the correct replacement model all influence the practical decision.
Questions to ask a plumber before approving replacement
- What is the exact leak source: the drain valve, T&P discharge, a connection, or the inner tank?
- What observation confirms that source, and is any further non-destructive test needed?
- If the part is repairable, what is the full repair cost and expected reliability?
- What do the model/serial number and warranty terms say about coverage?
- If replacement is necessary, does the estimate include applicable permits, safe venting or electrical requirements, and management of any water damage?
8. Can sediment or corrosion cause a bottom leak?
Minerals and sediment can collect in a storage-tank heater and contribute to efficiency problems, noise, and long-term stress. Corrosion protection also depends on the tank's design, water conditions, and the condition of protective components such as the anode rod. Bradford White explains the performance effects of sediment buildup.
But a layer of sediment does not prove the cause of today's puddle, and flushing the tank cannot repair a hole in its pressure-containing wall. Do not attempt to flush an actively leaking hot tank to see whether the leak stops.
Maintenance after the current problem is resolved
For a properly functioning heater, follow the specific manufacturer's inspection and maintenance schedule. Ask a qualified technician about corrosion protection, relief-valve safety, appropriate sediment management, and whether a water-leak alarm or drain-pan improvements would reduce potential water damage. Maintenance intervals and suitable work vary with the model and local water conditions; no one replacement schedule or life-extension guarantee applies to every water heater.
9. Frequently asked questions
Is a water heater leaking from the bottom an emergency?
A confirmed tank leak or rapidly spreading water requires prompt professional attention. Gas odor, a CO alarm, wet electrical equipment, or dangerous hot-water discharge calls for immediate emergency precautions. Even a small unexplained leak should not be ignored or treated as safe to keep operating.
Can I keep using hot water if the heater is dripping at the bottom?
Avoid using the heater until its leak source and safety are established. Continuing to run a damaged pressurized tank or an appliance with a safety-device or electrical issue could make conditions worse. Follow qualified, model-specific advice before restarting it.
Does a gas water heater leaking water from the bottom mean gas is escaping?
No. A water leak and a fuel-gas leak are different problems. Water may appear at a valve, discharge pipe, fitting, or the tank. If you smell gas or suspect a fuel-gas release, leave immediately and call for help from outside; do not attempt to inspect the gas controls.
Could a drain valve leak without the tank being ruined?
Yes. A drain-valve fault can sometimes be repaired without replacing the full unit. A professional needs to verify whether the leakage is from the valve, its threaded connection, or the tank fitting before selecting a repair.
Can condensation make it look like the bottom of a water heater is leaking?
Yes, under certain conditions. Some gas water heaters and cold pipes can collect moisture that reaches the floor. This is a possible explanation, not proof that the unit is safe; recurring or unexplained water still deserves inspection.
Will flushing out sediment fix a leak at the bottom?
Flushing may be part of routine maintenance on a sound heater when allowed by its manual, but it will not seal a corroded or breached tank. Do not start draining a leaking hot tank as a diagnostic experiment.
What if the water actually starts at the top?
An upper plumbing or fitting leak can run down the jacket and collect at the base. If the source is elsewhere on the heater, see our general water heater leak troubleshooting guide for a broader overview. A top-origin leak needs its own accurate source diagnosis.
10. Manufacturer documentation and safety references
This homeowner guide is informed by manufacturer technical materials and safety agencies. Technical bulletins may contain service-only procedures; links are provided for context, not as permission to work on gas, electrical, or pressurized components.
- A. O. Smith: Technical Bulletin #51 — Puddle on Floor
- A. O. Smith: Technical Bulletin #15 — Condensation
- A. O. Smith: Technical Bulletin #52 — Leaking T&P Relief Valve
- Rheem: Technical Service Bulletin #1223 — How to Diagnose a Leaker (PDF)
- Bradford White: Deciding Between Water Heater Repair and Replacement
- Bradford White: How Sediment Buildup Affects Water Heater Efficiency
- PG&E: Natural Gas System Safety
- CDC: Protecting Yourself From Electrical Hazards
- CDC: Carbon Monoxide Poisoning Basics
Need the broader diagnosis?
This article focuses specifically on water collecting near the bottom of a storage-tank heater. For other locations and general symptoms, read Water Heater Leaking? Causes and What to Do.